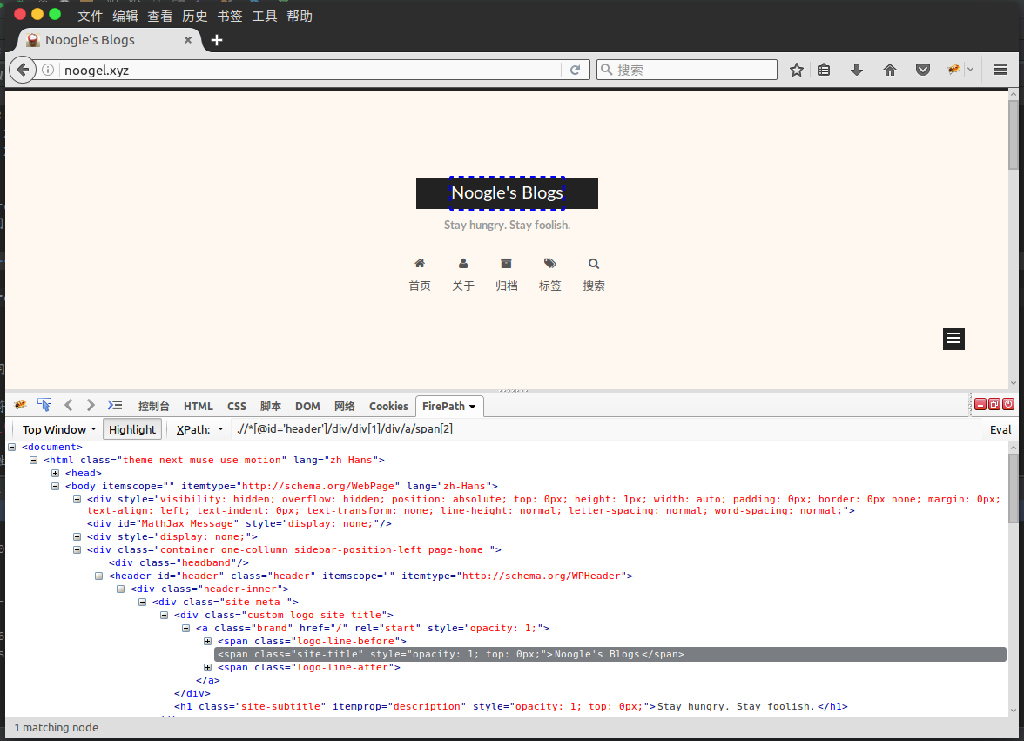
你的Ubuntu还可以这么美
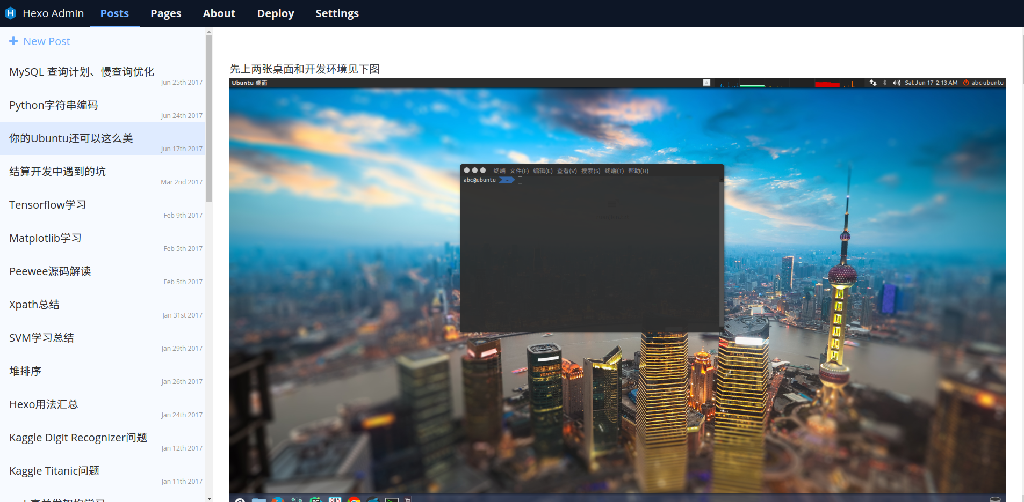
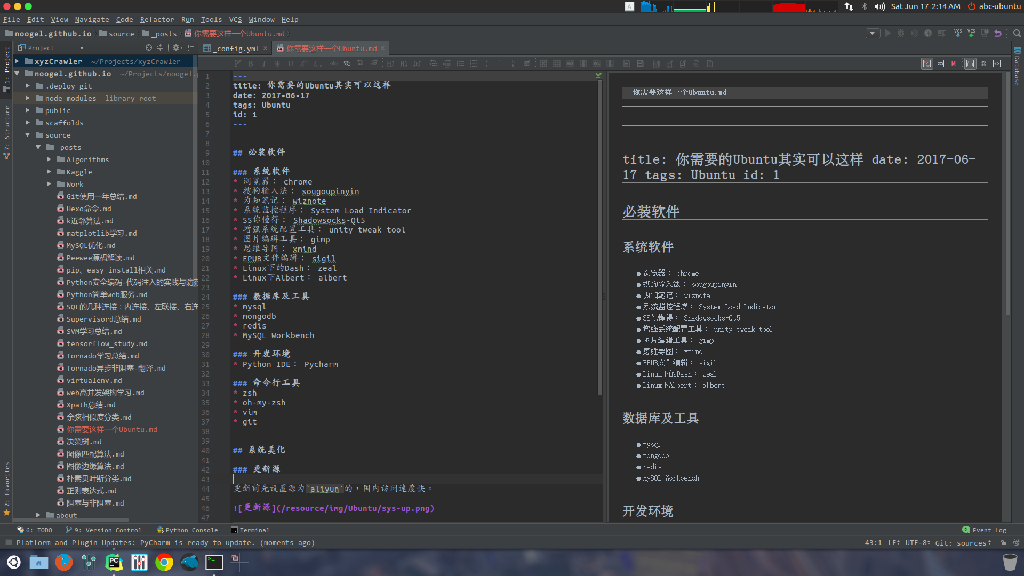
先上两张桌面和开发环境见下图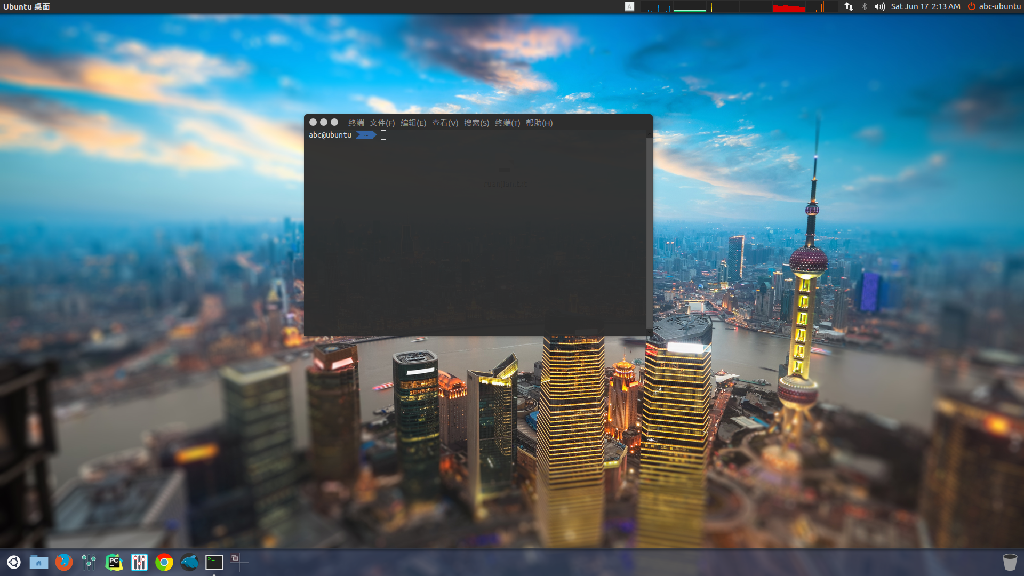
系统优化
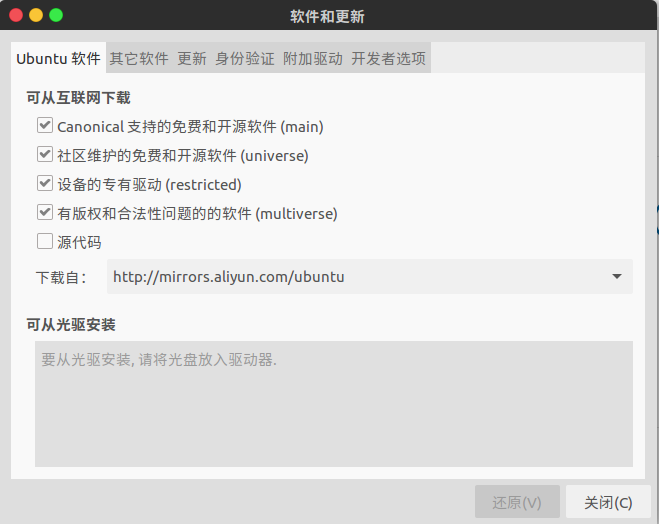
更新源
更新前先设置源为aliyun的,国内访问速度快。
1 | sudo apt-get update |
删除Amazon的链接
1 | sudo apt-get remove unity-webapps-common |
主题美化
先装 Unity 图形管理工具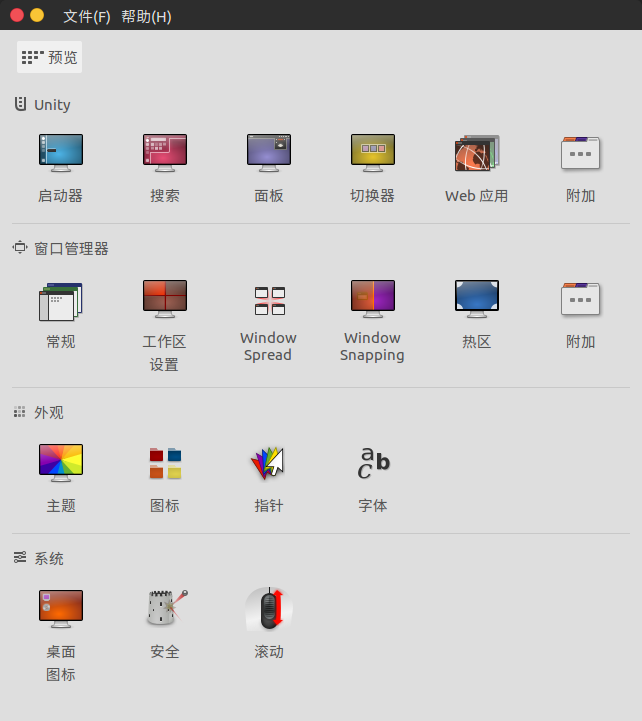
1 | sudo apt-get install unity-tweak-tool |
然后安装 Flatabulous 主题
1 | sudo add-apt-repository ppa:noobslab/themes |
和配套图标
1 | sudo add-apt-repository ppa:noobslab/icons |
更换操作如下图:
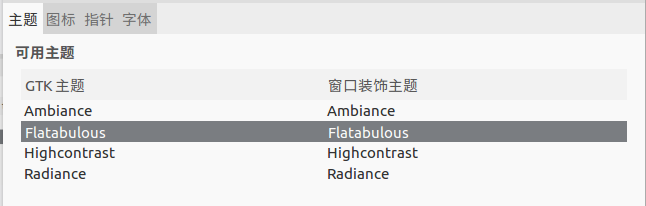
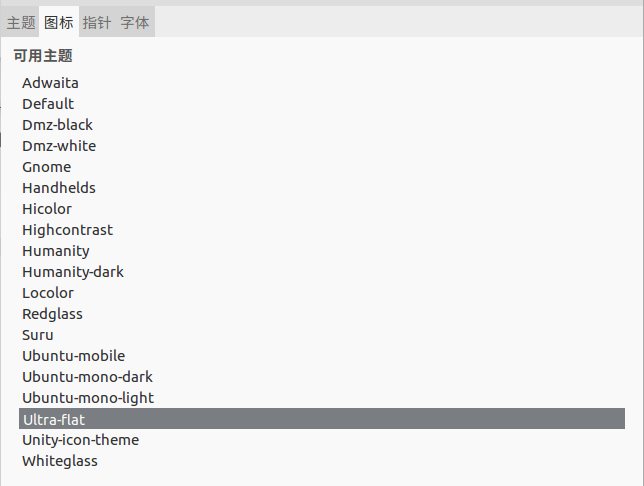
至此主题美化完成
System Load Indicator(系统状态指示器)

1 | sudo add-apt-repository ppa:indicator-multiload/stable-daily |
微软雅黑
1 | tar zxvf YaHeiConsolas.tar.gz |
安装zsh

1 | sudo apt-get install zsh |
然后再重新注销登录就好了
必装软件
下面介绍的软件有一部分是通过 deb 文件安装的,具体安装方式见 系统使用技巧。
系统软件
- 浏览器: Chrome
- 搜狗输入法: sougoupinyin
- 为知笔记: wiznote
- 系统状态指示器: System Load Indicator
- SS你懂得: Shadowsocks-Qt5
- Unity图形管理工具: unity tweak tool
- 图片编辑工具: gimp
- 思维导图: xmind
- EPUB文件编辑: sigil
- Linux下的Dash: zeal
- Linux下Albert: albert
- 网易云音乐播放器
- Robomongo
数据库及工具
- mysql
- mongodb
- redis
- MySQL Workbench
开发环境
- Python IDE: Pycharm
命令行工具
- zsh
- oh-my-zsh
- vim
- git
系统使用技巧
DEB软件安装
- 安装命令
sudo dpkg -i xxx.deb
- 安装过程中可能会报缺少依赖的错,执行下面命令自动安装依赖
sudo apt-get install -f
- 再次执行安装命令
sudo dpkg -i xxx.deb
卸载不再依赖的包 命令
sudo apt-get autoremove
未完待续,欢迎大家发送你的优化点到我的邮箱 noogel@163.com